Sanding your ceiling might seem like a daunting task, but it can bring numerous benefits to your home. Whether you’re preparing for a fresh coat of paint, addressing imperfections, or aiming to enhance the overall aesthetics of your living space, understanding the importance of sanding is key.
In this guide, we’ll walk you through the reasons why you should consider sanding your ceiling, the step-by-step process, and the final touches to ensure a smooth and professional finish.
You may also read: Pool Test Kits vs. Pool Test Strips: How to Use Them to Test Pool Water Quality
Why should I sand my ceiling?
Sanding your ceiling is not an easy task, but it can bring several benefits to your home. Whether you’re planning to repaint, fix imperfections, or just refresh the overall look, sanding plays a crucial role.
Here are some key reasons why you should consider sanding your ceiling:
- Smooth Surface: Sanding helps create a smooth surface by removing any rough patches, bumps, or imperfections on your ceiling. Over time, ceilings can develop minor flaws due to settling, ageing, or previous repairs. Sanding smoothens these irregularities, providing a clean canvas for your next paint job.
- Paint Adhesion: If you’re planning to repaint your ceiling, sanding is a crucial step to ensure better paint adhesion. Old paint may become uneven or peel over time, making it necessary to remove these layers before applying a fresh coat. Sanding promotes a stronger bond between the new paint and the ceiling, resulting in a longer-lasting and more professional finish.
- Improved Aesthetics: Sanding contributes to the overall aesthetics of your living space. A smooth and flawless ceiling enhances the visual appeal of any room, making it look well-maintained and inviting. By investing time in sanding, you can achieve a polished finish that elevates the entire atmosphere of your home.
- Repairing Damage: Ceilings can suffer from various damages, such as cracks, water stains, or dents. Sanding allows you to address these issues effectively. By smoothing out the damaged areas, you can prepare the surface for repairs, ensuring a seamless and cohesive appearance once the fixes are complete.
- Healthier Indoor Environment: Over time, ceilings can accumulate dust, dirt, and other particles. Sanding helps remove these contaminants, contributing to a healthier indoor environment. A cleaner ceiling can also prevent the formation of mould or mildew, reducing the risk of respiratory issues and creating a more comfortable living space.
- Increased Property Value: Home improvement projects, such as sanding and repainting, can increase the overall value of your property. Potential buyers often appreciate well-maintained homes with aesthetically pleasing features. A smooth and freshly painted ceiling can leave a positive impression, making your home more appealing to prospective buyers.
- DIY-Friendly Task: While the idea of sanding might sound challenging, it is a DIY-friendly task that doesn’t require advanced skills. With the right tools and a bit of patience, you can successfully sand your ceiling and achieve professional-looking results. This can save you money on hiring a professional while giving you the satisfaction of completing a home improvement project yourself.
Do ceilings need to be sanded before painting?
Sanding ceilings before painting is generally recommended, although there are some considerations to keep in mind. Sanding helps create a smooth and even surface, providing several benefits:

- Surface Preparation: Sanding removes imperfections, bumps, and rough spots on the ceiling. This creates a uniform surface, ensuring better adhesion for the paint.
- Paint Adhesion: A sanded surface allows the new paint to adhere more effectively. It promotes a stronger bond, reducing the likelihood of peeling or flaking over time.
- Smooth Finish: Sanding helps achieve a smooth finish, especially important if you’re using glossy or semi-gloss paint. It ensures a professional and aesthetically pleasing result.
- Hiding Imperfections: Sanding can help hide minor imperfections in the ceiling, such as small cracks or dents, providing a more polished appearance.
However, there are situations where sanding might be less critical:
- New Construction: In newly constructed homes or rooms with brand-new drywall, the surface is usually smooth, and sanding might be minimal.
- Textured Ceilings: Some ceilings have texture (like popcorn ceilings). In such cases, the texture itself might be the desired finish, and extensive sanding may not be necessary.
- Using Primer: If you’re using a high-quality primer, it might fill in minor imperfections and create a suitable surface for the paint. However, sanding is still recommended for the best results.
Before sanding, it’s important to check for issues like peeling paint, stains, or water damage. Addressing these problems before sanding and painting is crucial for a successful and long-lasting finish.
How to sand the ceiling?
Getting Ready for the Job
Check if your ceiling has Asbestos-contained
Before diving into any sanding or renovation task, it’s crucial to figure out if your ceiling has asbestos. Asbestos, a hazardous substance, was commonly used in popcorn ceilings, especially in older homes. Disturbing materials with asbestos can release harmful fibres into the air which can cause cancer. Therefore, it’s vital to conduct a test.
Take a small sample of the popcorn texture from the ceiling and send it to a local lab for analysis. If asbestos is detected, leave the ceiling alone and hire a professional contractor. If not, you can move forward with your project.
Clear the space
Get rid of all furniture, fixtures, and other items from the room. This not only protects them from dust and debris but also gives you ample space to work.
Cover the floor and walls
Cover the floor with plastic sheets to prevent dust and particles from settling. Use painter’s tape to secure plastic sheeting along the adjacent walls, creating a barrier that minimizes the spread of dust.
Gather your tools and materials
Ensure you have the following items ready:
- Safety goggles
- Dust mask
- Plastic sheets
- Sander
- Sandpaper (120–220 grit)
- Vacuum cleaner
- Step ladder (if needed for ceiling height)

Easy Steps to Sand Your Ceiling
Now that you’ve done all the necessary preparations, let’s break down the step-by-step process of sanding your ceiling without creating a mess.
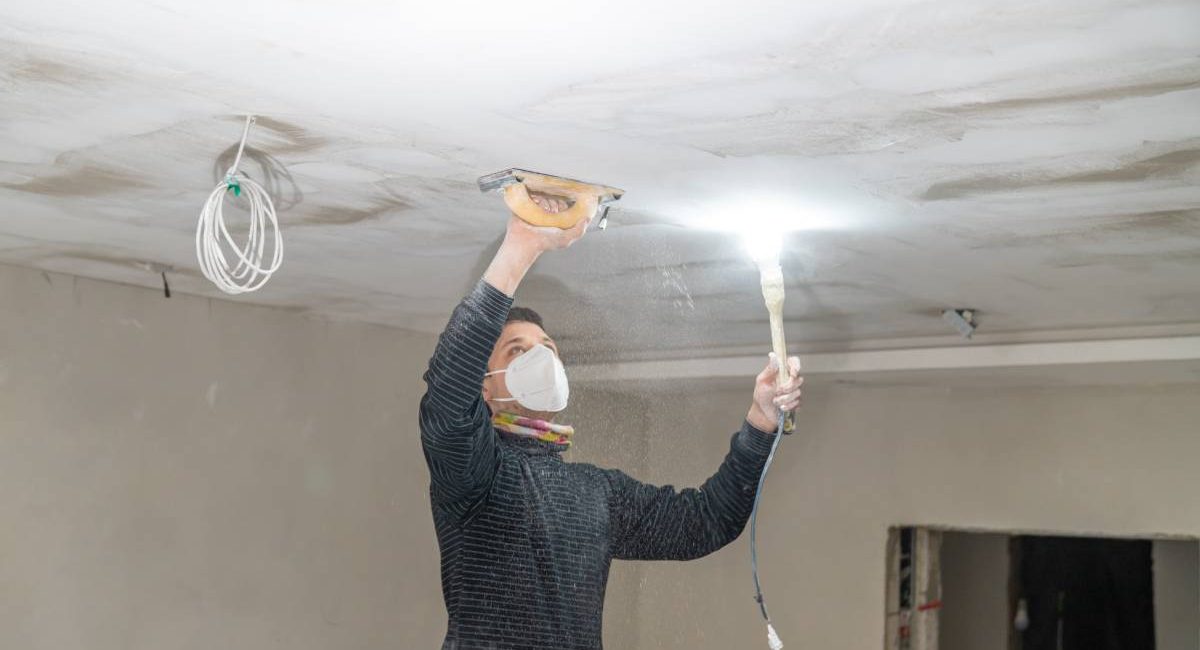
Step 1: Gear Up for Safety Before diving into sanding, prioritize your safety. Put on safety goggles to shield your eyes from dust and a dust mask to avoid inhaling any potentially harmful substances.
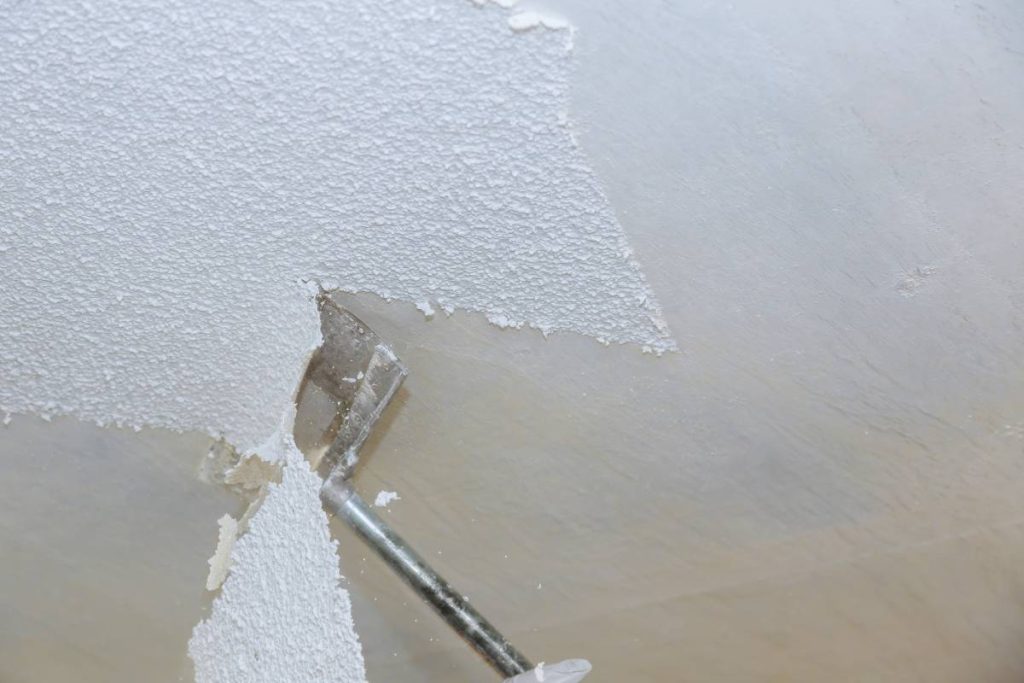
Step 2: Check and Fix Ceiling Flaws Inspect the ceiling for cracks, holes, or imperfections. Use a joint compound and a putty knife to fill in these areas. Wait for the compound to completely dry before moving on to sanding.
Step 3: Surface Test Before tackling the whole ceiling, it’s crucial to test a small area first. Lightly sand a small patch and check the results. If the paint or texture comes off easily without excessive dust, you can proceed confidently.
Step 4: Get Ready for Sanding Attach the sandpaper to the sanding pole or extendable drywall sander for easy access without the need for ladders. Start with a coarse-grit sandpaper, like 120 grit, and gradually shift to finer grits, such as 180 grit, for a smoother finish. Make sure the sandpaper is securely attached.
Now, begin sanding the ceiling in circular motions, using long and even strokes. Keep the sanding pole or sander flat against the surface for an even finish. Start from one corner and systematically work your way across the ceiling. Apply gentle pressure, avoiding pressing too hard to prevent damage. Work on small areas at a time for the best results.
Step 5: Tidy Up as You Work To keep the air and floor dust-free, regularly use a vacuum cleaner to clean up the sanding dust. If you’re using Bravex, it can be connected to your vacuum cleaner, absorbing 99% of dust while you sand.
Step 6: Give the Ceiling a Wipe Down After finishing the sanding, dampen a clean rag or sponge with water and wipe down the ceiling. This step ensures the removal of any remaining dust particles, leaving you with a clean and smooth surface ready for the next steps like treatment or painting.
Step 7: Final Cleanup Give the room a thorough cleaning by vacuuming the floor, taking down the plastic sheeting from the walls, and wiping any surfaces that may have collected dust during the sanding process. This final cleanup ensures your entire space is neat and dust-free.
In conclusion
Sanding your ceiling is a valuable step in home improvement that yields multiple advantages. From creating a smooth surface for painting to improving the overall aesthetics of your home, this seemingly simple task can have a significant impact. By following the outlined steps, you not only ensure a cleaner and healthier indoor environment but also contribute to increased property value.
So, whether you’re a seasoned DIY enthusiast or a first-time homeowner, embracing the benefits of ceiling sanding can transform your living space and leave a lasting positive impression.